Picture this: It’s lab day in your classroom. Students are excited, bustling to get started, and asking questions all at once. A few are searching for goggles, another group is unsure if they have the right materials, and suddenly… someone spills something. You’re racing against the clock, trying to answer rapid-fire questions while keeping the lab from descending into chaos. Sound familiar?
If you’ve experienced the whirlwind of lab days, know you’re not alone. The good news? With the right systems in place, you can have stress-free lab days in your classroom. Clear and effective systems not only save time and energy but also create an environment where students can focus, collaborate, and thrive in hands-on learning.
Today, I’m breaking down my five essential systems designed to help you transform your science lab into a well-oiled machine. From organizing materials to empowering students with responsibilities, these strategies will make lab day your favorite day of the week. Whether you’re a new teacher or just looking to refine your process, these strategies can make a big difference!
System 1: Material Organization
Imagine, all your students have the materials they need within minutes of starting class. No interruptions, no “Where’s the beaker?” Sound too good to be true? It’s not, this scenario is exactly what a well-organized lab setup can look like.
Having a well-organized material organization system saves you and your students valuable time and prevents confusion during labs. With everything clearly labeled and in its place, students can quickly locate the tools or supplies they need, allowing them to focus on the experiment rather than searching for materials. This system also ensures that every student has equal access to the necessary supplies, creating a fair and streamlined environment where everyone can participate fully and efficiently. Plus, it helps reduce the chances of misplaced items or last-minute shortages, making labs run smoother for both students and teachers.
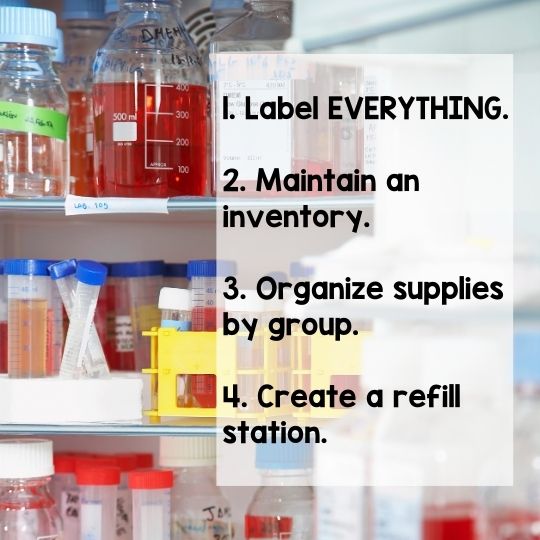
Here are actionable steps you can take in your space to up your material organization game:
- Label Everything: Clearly label all bins, drawers, and cabinets used to store lab equipment and materials. A label maker is a game-changer! In my lab, every supply-filled drawer and cabinet is labeled—not just for my benefit, but also for my students. This makes it easy for them to quickly locate the equipment they need at their station or the appropriate glassware in the cabinets.
- Maintain an Inventory: Keeping a detailed inventory is crucial behind the scenes. Create a checklist of commonly used materials and glassware so you’re prepared when budget season arrives. I also track broken equipment with a running tally, making it easy to see replacements needed at a glance. Regular inventory checks help ensure supplies are restocked before they run out, avoiding any mid-lab disruptions.
- Organize Supplies by Group: Assign numbers to each lab group to keep supplies organized and easy to manage. If storing supplies directly at lab tables isn’t an option, prepare trays labeled with each group’s number. Students can simply grab their group’s tray and head to their station. This system not only streamlines setup but also allows me to quickly identify if any materials are missing and address the issue with the specific group.
- Create a Refill Station: Designate an area where students can help themselves to extra materials, such as gloves, paper towels, or pipettes, without needing your immediate assistance. I call this the “Supply Station,” where I keep extra solutions and equipment not stored at their lab stations. Fortunately, I have a front demo table that doubles as this station on lab days, making it easy for students to access what they need.
Pro Tip: Store lab kits for each activity in pre-packed bins or trays, complete with all required tools and materials. This prevents scrambling to gather items before each class.
System 2: Teacher Preparation
When YOU are prepared, lab days feel less like a marathon and more like a smooth, well-earned victory lap. Preparation sets you up for success by eliminating last-minute scrambling and reducing unnecessary stress. It allows you to focus on the task at hand without distractions or mistakes caused by rushing. A calm, controlled environment not only helps keep things running smoothly but also ensures that everyone involved—whether it’s your team, colleagues, or students—benefits from a more positive and productive experience. Proper planning truly makes all the difference.

Here’s what I do before every lab to make sure everything runs smoothly on lab day:
- Copies: Make sure to print extra lab guides, safety instructions, and reflection sheets so every student has what they need. Keep some spares handy in case anyone loses or damages theirs, and store them somewhere easy to grab for quick replacements.
- Chemical Prep: Always measure solutions in advance to ensure accuracy and efficiency during experiments. Clearly label all containers with the chemical name, concentration, and date of preparation to avoid confusion. For added safety, use secondary containers to prevent spills or leaks, and always wear proper protective equipment when handling chemicals.
- Get Materials Ready: Gather and organize everything each group will need, and put them in clearly labeled trays or bins. Make sure every station has all the tools, supplies, and instructions so participants can dive right in without any confusion. Double-check that nothing’s missing to keep things running smoothly.
- Room Setup: Arrange lab stations to keep things organized and avoid crowding, making it easy for people to move around. Make sure safety equipment like fire extinguishers, eyewash stations, and first aid kits are easy to spot and access. Keep waste bins and containers nearby for sorting and disposing of hazardous and non-hazardous materials properly, while staying aligned with safety rules.
Pro Tip: Make yourself a lab prep checklist so that next year you’ll know exactly what needs to be done ahead of time. This is hands down my top tip for labs—it saves you from recalculating concentrations and solutions every year. Plus, if you have a lab assistant, the checklist will give them everything they need to get started without having to ask you a ton of questions.
System 3: Pre-Lab Set-Up
A well-prepared student is a self-sufficient student—and that’s a game changer during lab time! When students come to the lab equipped with the knowledge and confidence to work independently, they not only save valuable time but also deepen their understanding of the material through hands-on experience.
Student pre-lab preparation is crucial because it not only reduces repetitive questions and over-reliance on the teacher during the activity but also fosters a more efficient and engaging learning environment. When students take the time to review materials, understand procedures, and familiarize themselves with key concepts beforehand, they are better equipped to focus on the hands-on aspects of the lab. This preparation encourages them to take responsibility for their learning experience, promoting independence, critical thinking, and confidence in their abilities. Additionally, prepared students tend to collaborate more effectively with peers, leading to a smoother and more productive lab session for everyone involved.
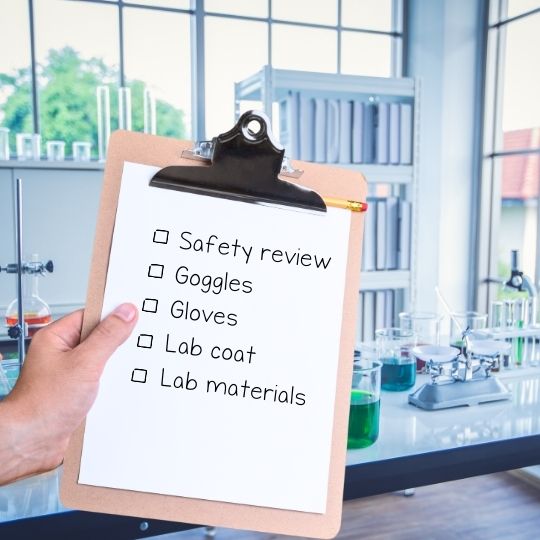
Here’s how I prepare my students for lab activities:
- Pre-Lab Checklists: Provide students with a detailed checklist to complete before starting the lab activity. This could include steps like ensuring all safety gear is properly worn (e.g., goggles, gloves, lab coat), gathering all necessary materials and equipment from the lab station, and answering pre-lab questions to confirm their understanding of the experiment’s purpose and procedure. This preparation ensures a smoother and safer lab experience for everyone.
- Lab Guides: Use clear, step-by-step printed instructions to guide students through the lab procedures. These instructions should be easy to follow, breaking down each step in a logical and concise way to minimize confusion. You can print out the procedures as part of the lab handout for individual use or place laminated copies at each lab station for quick and easy reference during the activity. Laminating or placing the procedures in plastic sleeves is a great way to protect them from spills, which are common in a lab setting. Alternatively, you can also project the procedures at the front of the room, allowing all students to follow along together and ensuring they stay on track. Don’t forget to include cleanup procedures as part of the instructions. Printing out these cleanup steps and posting them at each lab station or projecting them at the end of the lab ensures the space is reset properly for the next class and teaches students responsibility in maintaining a shared workspace.
- Quick Safety Review: Start each lab with a concise yet comprehensive safety review or a live demonstration of key procedures. This practice reinforces best safety practices, highlights potential hazards, and boosts students’ confidence in handling equipment properly. Demonstrating critical steps—such as using and reading a pipette or micropipette—provides students with a clear visual reference to guide them once they begin their experiments at their lab stations.
Pro Tip: Include pictures in your lab handouts to clearly illustrate each step of the process. Visuals not only show students what’s expected at every stage but also provide a reference for how the workspace should look after clean-up—making it easier to reset for the next class. Additionally, adding images to your lab instructions can be a huge help for IEP and EL students so they can better understand the procedures and stay on track.

System 4: Student Roles and Responsibilities
When every student has a defined role, teamwork blossoms, and total chaos shrinks. Clearly communicating student roles and responsibilities promotes collaboration, accountability, and effective time management. By assigning roles like leader, note-taker, researcher, or presenter, students can focus on their specific tasks while contributing to the group’s overall success. This approach not only ensures all students stay engaged and contribute equally but also helps them develop important skills such as organization, communication, and problem-solving. Structured roles create a sense of purpose, making teamwork more efficient and rewarding for everyone involved.
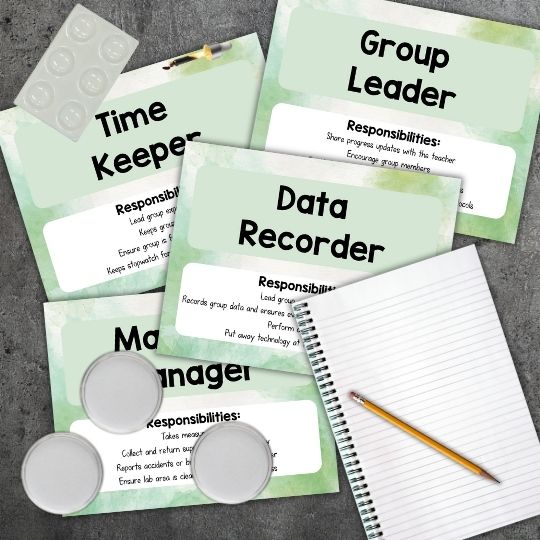
This system is truly my secret weapon for maximizing teamwork and accountability within student groups:
- Assign Roles: Assigning roles can make your lab day run more smoothly and help students stay focused and organized. Check out my freebie, which includes traditional lab roles like materials manager and timekeeper, or switch things up with an engineering theme for lab roles: Logistics Engineer, Mechanical Engineer, Computer Engineer, and Systems Engineer. Each role comes with clear expectations to ensure every student knows their responsibilities. The freebie includes full-color or black-and-white role signs, available in both large and small sizes, making it easy for you to prepare for lab day. These signs help create a structured environment, so students can collaborate effectively and gain hands-on experience in their assigned roles.
- Mix Up Roles and Groups: To encourage teamwork and skill-building, don’t let students get stuck doing the same thing every lab. Rotate roles so everyone gets a chance to try out different tasks like leading, note-taking, or hands-on work. Also, switch up group pairings after every two labs to keep things fresh, promote diversity in teamwork, and help students connect with new people. This creates a more balanced and engaging learning experience for everyone.
- Clear Guidelines: Use laminated cards or posters with simple role descriptions so students can quickly check their tasks during group activities. This makes group work smoother and more collaborative by keeping everyone on the same page. Check out my free lab roles resource for easy tips on how I introduce group roles and responsibilities right at the start of the school year to build a solid foundation for success.
Pro Tip: Reward groups and individual students who work efficiently and clean thoroughly with meaningful recognition, such as a shout-out in class, extra credit points, or small prizes like stickers, snacks, or school supplies. These incentives encourage responsibility and help create a positive and motivated classroom environment.
System 5: Clean-Up Procedures
A messy lab today makes tomorrow’s class twice as hard, so having effective clean-up systems in place is non-negotiable. Not only does a clean and organized space ensure a smoother workflow, but it also promotes safety and helps maintain equipment for future use. Taking time to clean up now saves time and stress later.
Keeping a quick clean-up routine helps your lab stay organized, functional, and safe for everyone. It prevents accidents from spills or misplaced gear, so work can keep going without unnecessary interruptions. Plus, it encourages students to take responsibility and respect shared spaces, showing them how important it is to maintain a clean, professional environment for the whole group.
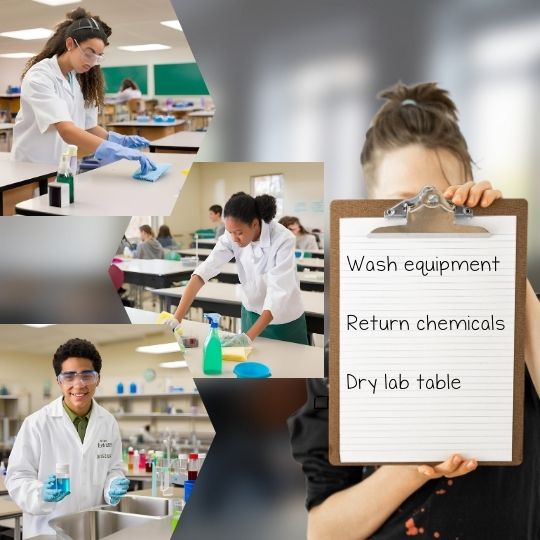
Here are my go-to tips for getting my students to take ownership and stay accountable for cleaning up the lab in my classroom:
- Clean-Up Checklists: Give clear, step-by-step instructions at each station to help students through the process. For example, you could include tasks like “rinse glassware with warm water,” “clean counters with disinfectant wipes,” and “put all equipment back in its designated spot.” Easy-to-see checklists make sure nothing gets missed.
- Set a Timer: Make clean-up more fun by turning it into a challenge! Set a timer and get students to work together to beat the clock. It’s a simple way to add some excitement while keeping things quick and organized.
- “Clean-Up Inspector”: Assign the Materials Manager and Mechanical Engineer roles as “Clean-Up Inspectors.” Their job is to make sure everything gets done properly and thoroughly. They can also pitch in with reminders or help their teammates, encouraging accountability and teamwork while highlighting the importance of keeping the workspace clean.
Pro Tip: Keep a “lost and found” bin for stray materials or tools left behind after each class.
Make Lab Days a Breeze
Stress-free lab days aren’t just wishful thinking—they’re totally doable with the right setup. Even trying out one or two of the tips above can turn your classroom into an awesome space for hands-on learning.
Got any favorite tricks for smoother lab days? Or maybe a challenge you’re trying to tackle? Share your thoughts in the comments—we’d love to hear from you!
💡Feel free to explore Keystone Science for ready-to-use high school biology & ecology NGSS aligned notes and activities.
💡Subscribe to my email list for weekly tips direct to your inbox.
💡Follow me on Instagram for daily tips, motivation, and facts you can use in your classroom!
🌟Share in the comments or email me directly 👉🏻 [email protected]


